Charging System
SAFETY FIRST: Protective gloves and eyewear are recommended at this point.
You will need a digital multimeter to inspect the charging system
Battery
Batteries should be inspected for damage or leaks and cleaned every 30 days, and the fluid level checked. Batteries contain sulfuric acid, which is highly corrosive and can cause damage or injury. Use baking soda to neutralize any acid spills, but do not get baking soda in the battery. To add water to the battery, remove it from the motorcycle, remove the filler caps and add distilled water until the fluid level is between at or just above lower level line on the battery. Do not use tap water as it contains minerals that can shorten the life of the battery. Do not overfill the battery as this can cause acid leaks. Replace the filler caps carefully as they break very easily and can not be purchased separately. When reinstalling the battery, be sure to connect the vent hose and rout it properly. The battery will need to be charged every 30 days or so if the motorcycle is not being used. Always use a charger designed specifically for motorcycle batteries as an automotive charger can damage the battery.
Removal
Remove the seat. See the Seat topic for more information.
Remove the fuel tank. See the Fuel tank topic.
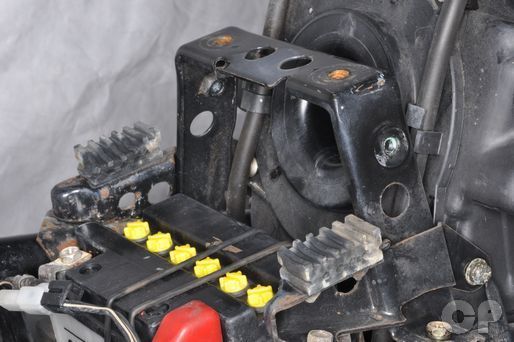


Loosen the lower fuel tank bracket bolts with a 12 mm socket. Remove the two lower fuel tank bracket bolts.


Remove the two forward fuel tank bracket screws with a #2 Phillips screwdriver.

Remove the fuel tank bracket.
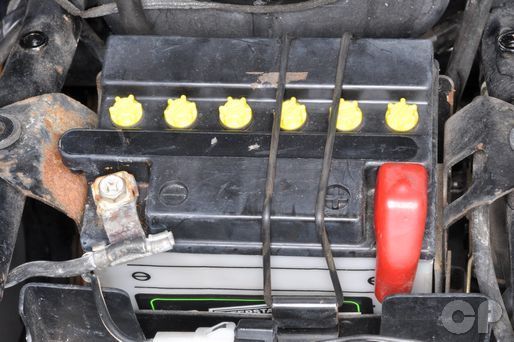


Remove the negative battery cable screw with a #3 Phillips screwdriver. Free the negative battery lead from the negative battery terminal.


Pull back the red rubber cover and loosen the positive battery cable screw with a #3 Phillips screwdriver. Remove the screw and free the cable from the positive battery terminal.


Unhook the battery retainer band and lift the batter out of its box.
Installation
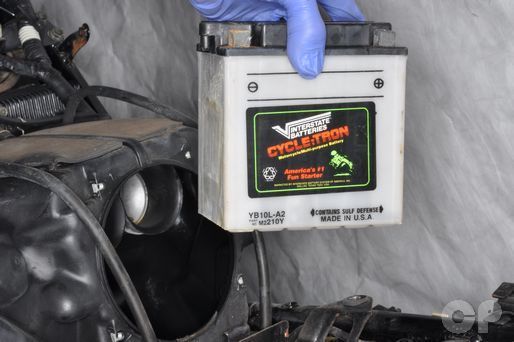
Place the battery into the battery box.

Install the battery band over the battery.
Connect the cables to their respective battery terminals. Connect the positive cable first. Tighten the screws securely with a 10 mm socket or a #3 Phillips screwdriver.
Set the fuel tank bracket in place.
Install the two forward fuel tank bracket mounting screws. Tighten the screws securely with a #2 Phillips screwdriver.
Install the two lower fuel tank bracket mounting bolts. Tighten the bolts securely with a 10 mm socket.
Install the fuel tank. See the Fuel Tank topic for more information.
Install the seat. See the Seat topic for more information.
Inspection
Battery Voltage
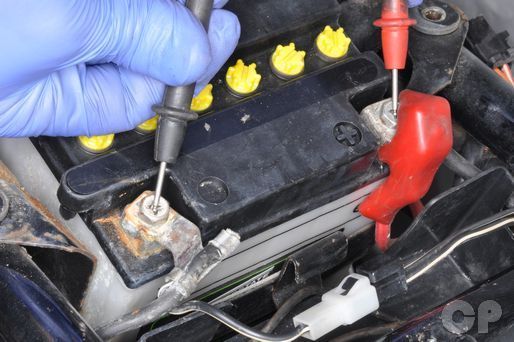
Set the multimeter to read voltage and connect the probes to their respected terminals. The battery should read at least 12.45 V. If the battery reads under 12.3 V it is undercharged.
Charging Voltage
To check the charging voltage make sure the battery is in good condition.
Remove the seat. See the Seat topic for more information.
Let the bike warm up to for several minutes. Turn the high beams on. Set the multimeter to read voltage and connect the probes to their respected terminals. Rev the engine to 5,000 rpm and measure the voltage.
(Charging Output: 13.6 - 14.4 V @ 5,000 rpm)
For information on the generator, see the Generator topic.
Copyright 2025 - Cyclepedia Press LLC

Note: If you are viewing this document offline be sure to visit the latest version online at http://www.cyclepedia.com before attempting any repairs. Updates are made without notice.